
The finished toy

NX model of the toy
-
Final project for Northwestern's course on Computer-Aided Manufacturing (CAM)
-
1 week to design and manufacture the toy
-
3 hour total machine run time across two setups (for the top and bottom of the toy)
Objective:
Apply knowledge from the CAM course to manufacture an object of choice with a Haas CNC Mill.
Personally, I wanted to make something fun, which would also challenge me. Fidget spinners were a fad at the time, so I thought it would be fun to take the bearing out of a plastic one and make an aesthetic aluminum housing for it.
3D Modeling and Manufacturing:
The toy went through several design iterations to optimize its design for aesthetics and ease of manufacture.
In the screenshot on the right, the size of the green channel matched the yellow ball mill (1/4" diameter) which would quickly form the feature.

Example of tooling that matched aesthetic features
Machine Coordinate System (MCS) Datums:
The part had to maintain alignment when it was flipped over for machining the opposite face. A set of perpendicular faces was machined in the first setup (Left Image) which was then used as the machine coordinate system for the second setup (Right Image)


Final Operations List:
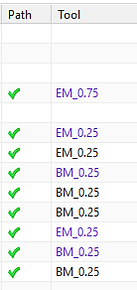
The overview of each CNC operation for the first setup (Left) and the second setup (Right)


Running the CNC Mill:
From helping teammates in Northwestern's Rocketry Club (NUSTARS) I had access to aluminum stock with a desirable diameter for the project.
I used a bandsaw to obtain a blank starting piece which was slightly large than the part. A 3 jaw chuck was secured to the table of the mill with toe clamps. The part was on parallels inside the chuck, allowing its edges to be machined without damaging the chuck. (Right)


(Left) The part at the end of the first machining setup. Notice the through pocket which was used as the reference datum for the second setup's MCS (Right)

The part after final machining. Several operations incrementally removed 0.0005" on the diameter of the central hole until the bearing fit snuggly
Extended Report:
I wrote a report on the project for the course which can be downloaded by clicking the pdf button to the right. It includes additional descriptions of various tool paths and rationale behind various project decisions